Mastering The Art Of Coloring Grass: From Artwork To Your Lawn
When you hear "how to color grass," what comes to mind? Do you picture an artist meticulously adding strokes of green to a landscape painting, or a homeowner striving for that perfect emerald lawn? Perhaps you even imagine a crafter transforming fluffy pampas grass into a vibrant decorative piece. The truth is, "coloring grass" encompasses a surprisingly wide range of activities, each with its own techniques, purposes, and satisfying outcomes.
From enhancing the realism of your drawings to revitalizing a patchy lawn, and even creating natural dyes, grass offers a versatile canvas. In this comprehensive guide, we'll explore the various facets of coloring grass, providing tips and insights for artists, homeowners, and DIY enthusiasts alike. Get ready to dive into the world of greens, textures, and vibrant transformations!
Coloring Grass in Your Artwork: Bringing Landscapes to Life
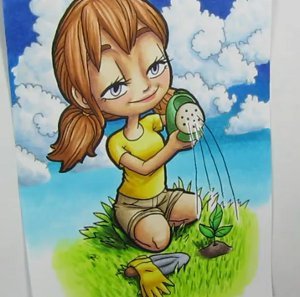
For artists, knowing how to color grass can elevate your artwork from flat to truly captivating. Whether you're working on a sprawling landscape, a whimsical nature-themed coloring page, or a cute character standing in a field, realistic grass adds depth, texture, and a sense of natural beauty. It's not just about slapping on a single shade of green; it's about creating an illusion of life.
Essential Techniques for Realistic Grass
Achieving a natural look for grass in your drawings or paintings involves more than just picking a green color. It's about layering, adding dimension, and mimicking the organic chaos of nature.
- Layering Greens: Grass isn't uniform. Use multiple shades of green – from yellowish-greens to deep forest greens – to create depth and variety. Start with a lighter base layer, then build up with darker tones for shadows and definition.
- Adding Highlights: Just like any other element in nature, grass catches light. Introduce lighter greens or even touches of yellow to simulate sunlit areas, making your grass pop and appear more three-dimensional.
- Creating Texture: This is crucial for realism. Instead of solid blocks of color, think about individual blades or clumps. Techniques like dotting, short strokes, or even scribbling can create the illusion of countless blades.
- Outlining: For initial planning, use a pencil to lightly outline the general area of the grass. This helps define the shape and flow before you commit to color.
Tools of the Trade for Artists
Different mediums offer unique ways to approach coloring grass, each with its own advantages for achieving specific effects.
- Colored Pencils: These are fantastic for detailed work and layering. With colored pencils (like Prismacolor Premier, for example), you can achieve incredibly realistic textures by building up layers of different greens and using short, directional strokes to mimic individual blades. A simple technique can make your grass look "more real than nature."
- Markers: Markers, such as Ohuhu markers, are excellent for creating soft, natural textures quickly. You can use dot techniques and color blending to achieve a lush and layered effect in just a few simple steps. They're perfect for coloring books and DIY art projects, allowing for vibrant color application and smooth transitions.
- Coloring Books: Many coloring books, like "Cozy Buddies" or "Southern Lotus Coloring Book," offer dedicated pages to practice grass coloring. These provide pre-drawn outlines, allowing you to focus purely on color blending and texture creation. They're a great starting point for beginners to learn how to make grass shine.
Step-by-Step Approach to Artistic Grass
While specific techniques vary by medium, a general approach can guide you:
- Base Layer: Apply a light to medium green as your initial layer, covering the general area.
- Add Depth: Introduce darker greens in areas that would be in shadow or where grass clumps together. Layering helps build richness.
- Create Texture: Using short, varied strokes or dot techniques, begin to suggest individual blades or clumps of grass. Vary the direction of your strokes for a natural look.
- Highlight: Apply lighter greens or even a touch of yellow to areas that would catch the light, adding dimension and vibrancy.
- Refine: Step back and assess. Add more details, blend colors further, or intensify shadows as needed to achieve your desired realistic effect.
Bringing Green to Your Lawn: Revitalizing Your Landscape
Beyond the canvas, "coloring grass" takes on a very practical meaning for homeowners. Brown grass, whether due to drought, disease, or dormancy, can detract from even the most gorgeous landscape. This is where grass dye or grass paint comes in – a temporary, yet effective, solution to achieve that lush, green look.
What is Grass Dye/Paint?
Grass dye, often referred to as grass paint, is a specially formulated coloring solution designed for turf grass. It's typically a combination of water, pigments, and binders, along with proprietary additives that help it adhere to the grass blades. It's a popular choice for homeowners who want to enhance the aesthetic appeal of their lawn without waiting for new growth or dealing with extensive repairs.
It's important to note that grass paint will stain hard surfaces like concrete, fences, and sidewalks, so careful application is key.
DIY Grass Dye Options
While commercial grass dyes are readily available, you can also explore homemade solutions, which can be a cheaper alternative for covering brown spots or for a total lawn application:
- Natural Ingredients: Some homeowners experiment with natural ingredients like food coloring, fertilizer (which helps grass green up over time), and Epsom salt. While food coloring provides immediate visual impact, the long-term benefits and issues need to be considered.
- Homemade Grass Green Paint: Creating your own grass green paint allows for customization of colors and textures. This involves mixing pigments with a suitable binder and water. Guides are available to walk you through the materials needed and the step-by-step process to ensure your paint turns out beautifully.
Application Tips for Lawn Dye
Applying grass dye or paint requires a bit of preparation and careful execution to ensure an even, natural-looking result:
- Prepare Your Lawn: Mow your lawn to the desired height before application. Remove any debris.
- Mix According to Instructions: If using a commercial product or a homemade solution, follow mixing ratios carefully to achieve the right shade and consistency.
- Apply Evenly: Use a sprayer designed for lawn applications. Apply in even, sweeping motions to avoid streaks or overly dark patches. Multiple thin coats are often better than one thick coat.
- Protect Hard Surfaces: Cover any concrete, paving, or other hard surfaces adjacent to your lawn to prevent staining.
- Consider the Benefits and Issues: Grass dye offers immediate visual improvement, is non-toxic to grass, and can last for weeks. However, it's temporary, can rub off on shoes or pets if not fully dry, and requires reapplication.
Decorating with Dyed Pampas Grass: A Pop of Color for Your Home
Moving from the lawn to home decor, pampas grass has become a beloved element for its fluffy, bohemian charm. But did you know you can easily dye it to match any interior design or floral arrangement? This project is fun, fabulous, and involves minimum spend, effort, or time outdoors, delivering maximum visual impact.
It's incredibly simple to dye your pampas grass in any shade you desire. Whether you want a soft pastel or a bold, vibrant hue, adding color to pampas grass is very easy and doesn’t require any specialized skills. You only need a few basic supplies to transform these natural plumes into a beautiful pop of color for your next floral arrangement or home display.
Eco-Friendly Dyeing: Grass Clippings for Fabric
Finally, for those interested in sustainable crafting, grass offers a unique opportunity to create natural dyes for fabric. Yes, fresh grass clippings from your yard can be repurposed to produce beautiful, earthy green hues for textiles!
This process involves a few simple steps:
- Prepare Clippings: Gather fresh grass clippings. The greener and fresher, the better for dye extraction.
- Simmer: Place the clippings in a pot with water and simmer them gently. This process extracts the natural pigments. You might need to experiment with ratios and simmering times to achieve your desired shade.
- Strain and Prepare Fabric: Strain the grass material out of the dye bath. Prepare your fabric (which should ideally be natural fibers like cotton, linen, or wool) by mordanting it if necessary, to help the dye adhere.
- Dye Fabric: Submerge your fabric in the grass dye bath and let it soak, gently simmering, until it reaches the desired color.
- Rinse and Set: Rinse the dyed fabric thoroughly until the water runs clear. To set the color, iron your dyed fabric, which helps bond the pigments to the fibers.
This method offers a wonderfully eco-friendly way to add natural color to your textiles, turning a common yard waste into a valuable crafting resource.
Conclusion
As we've explored, "how to color grass" is a question with many fascinating answers. From the meticulous layering of greens in an artist's sketchbook to the practical application of grass dye on a sprawling lawn, and even the creative transformation of pampas grass for home decor or fabric dyeing, grass proves to be an incredibly versatile medium. Each approach offers a unique way to enhance beauty, solve a problem, or express creativity, all centered around the humble green blade.
Whether you're picking up a colored pencil, a lawn sprayer, or a pot of grass clippings, the world of coloring grass is rich with possibilities, inviting you to experiment and discover the perfect shade of green for your next project.

29:53 How to Paint Grasses Using Different Brushes by JM Lisondra

How to do Grass in colored pencil - YouTube
How to Color Grass | FaveCrafts.com
