How To Shrink Rubber O-Rings: A Comprehensive Guide For A Perfect Fit
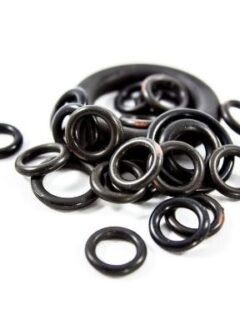
Rubber is an incredibly versatile thermoplastic polymer, a material so fundamental that it's used to build everything from everyday items like gloves and phone covers to essential components such as rubber bands and gaskets. Among its myriad applications, rubber O-rings stand out as ubiquitous seals in various industries. You'll find them in plumbing systems, automotive engines, industrial machinery, and even delicate medical devices. Their critical role is to create a tight seal, preventing leaks and ensuring the smooth operation of countless systems.
However, despite their durability, rubber O-rings aren't immune to wear and tear. Over time, especially when subjected to repeated use, pressure, or stretching during installation (like when fitting water pipes or hoses), these seals can become loose or even swollen. A stretched or enlarged O-ring compromises its sealing ability, leading to leaks, reduced efficiency, and potential damage to the equipment it's meant to protect. The good news is that replacing an entire O-ring can be costly and time-consuming, but often, it's not necessary. Just like other rubber products—from a stretched rubber band to an oversized pair of shoes—O-rings can often be shrunk back to their ideal size. This comprehensive guide will explore effective, natural methods to shrink your rubber O-rings, ensuring a perfect fit without resorting to harsh chemicals or damaging the O-ring itself.
Why Do Rubber O-Rings Stretch?
To understand how to shrink a rubber O-ring, it helps to know why they stretch in the first place. Rubber's unique properties as a thermoplastic polymer allow its molecules to change size when exposed to certain conditions, particularly heat. When an O-ring is used, especially in dynamic applications where it's repeatedly compressed or stretched, the polymer molecules can become elongated. This leads to a reduction in the O-ring's cross-sectional area and an increase in its overall diameter, making it loose and less effective as a seal.
Common scenarios that lead to O-ring stretching include:
- Repeated Installation and Removal: Each time an O-ring is stretched over a component, it can retain some of that elongation.
- Exposure to High Temperatures: While heat can shrink rubber, prolonged exposure to high temperatures can also cause some types of rubber to expand or degrade.
- Chemical Exposure: Certain chemicals can cause O-rings to swell, making them too large for their intended groove.
- General Wear and Tear: Over extended periods of use, the material naturally loses some of its original elasticity.
When these items become too large, they lose their functionality. A loose O-ring, for instance, won't create the necessary seal, leading to frustrating leaks in your plumbing or machinery.
Is Shrinking Rubber O-Rings Possible?
Absolutely! Shrinking rubber is a well-known phenomenon based on the properties of its polymer molecules. When these molecules are exposed to specific conditions, they can contract, allowing the rubber item to return to a smaller size. This applies to various rubber products, whether it's a small O-ring, a stretched rubber band, or even larger items like rubber car mats or shoes that have lost their original shape.
Instead of automatically replacing a stretched O-ring, which can be costly and time-consuming, exploring methods to shrink it can be a highly efficient and economical solution. This guide provides insights into how to achieve this, focusing on precision and ensuring the optimal performance and longevity of your O-rings.
Essential Considerations Before You Start
Shrinking rubber is a task that requires precision. The degree of shrinkage depends on the specific material of the O-ring and its intended application. Before you begin, keep these points in mind:
- Safety First: When dealing with heat, always ensure proper ventilation and consider using safety equipment like heat-resistant gloves.
- Material Matters: Different rubber compounds react differently to heat. While these methods are generally safe, always observe the O-ring closely.
- Minor Adjustments: These methods are ideal if you need minor adjustments to the size of the O-ring, rather than drastic changes.
- Cleanliness: Ensure the O-ring is clean before attempting to shrink it.
Effective Methods for Shrinking Rubber O-Rings
This comprehensive guide explores three natural and effective techniques to shrink a rubber O-ring, ensuring a perfect fit without resorting to harsh chemicals or damaging the O-ring itself. These methods primarily rely on heat treatment, which is a commonly used technique for resizing rubber.
Method 1: The Boiling Water Technique
Boiling is a method I have used a few times to good effect, especially for O-rings or gaskets that need a controlled and uniform application of heat. This method is ideal if you need minor adjustments to the size of the O-ring.
- Prepare Your Setup: Fill a small pot with water and bring it to a gentle boil. You can also use a controlled temperature bath if you have one, monitoring the temperature closely to ensure it remains consistent.
- Immerse the O-Ring: Carefully immerse the O-ring into the boiling water using tongs or a heat-resistant utensil. Ensure it is fully submerged.
- Monitor and Observe: Keep the O-ring in the hot water for a short period, typically 30 seconds to 2 minutes, depending on the O-ring's size and material. Observe the O-ring as it contracts. You'll notice it start to reduce its cross-section and diameter.
- Check for Ideal Size: Periodically remove the O-ring to check its size against the component it needs to fit. Do this quickly to avoid cooling it down too much.
- Rinse and Air Dry: Once the O-ring has reached the ideal size, remove it from the hot water, rinse it with cold water to stop the shrinking process, and then allow it to air dry completely before use. This helps set the new, smaller size.
Method 2: Applying Hot Air (The Hair Dryer Method)
This technique is excellent for smaller O-rings or when you need a more localized application of heat. It's also effective for shrinking rubber bands or even parts of larger items like shoes.
- Prepare Your Workspace: Find a stable surface. You might want to hold the O-ring with tweezers or small pliers if it's very hot.
- Apply Hot Air: Using a hair dryer on its highest heat setting, blow hot air onto the rubber O-ring. Try to be as uniform as possible, spreading the heat around evenly so that it can fully penetrate the rubber and shrink it equally all around.
- Observe Contraction: As you apply heat, you'll observe the rubber O-ring contracting. For instance, if you were to attach a small weight to a stretched rubber band and apply heat, you'd see the band contract as the weight is pulled up.
- Check and Repeat: Continuously move the hair dryer to avoid overheating one spot, which could damage the rubber. Periodically check the O-ring's size. You can repeat the process until you achieve the desired fit.
- Cool Down: Once the desired size is achieved, allow the O-ring to cool down naturally to room temperature before handling or installing it.
Method 3: Controlled Heat Treatment (Oven Method - Use with Caution)
While the boiling and hair dryer methods are generally safer for home use, some industrial or specialized applications might use more controlled heat treatment in an oven. This method requires extreme caution and precise temperature control.
- Preheat Oven: Preheat your oven to a very low temperature (e.g., 150-200°F or 65-93°C). Ensure the oven is clean and free of food residues.
- Place O-Ring: Place the O-ring on a non-stick, oven-safe surface or a piece of aluminum foil.
- Monitor Closely: Place the O-ring in the preheated oven. Monitor it extremely closely. Rubber polymer molecules have interesting properties that allow them to change size when exposed to heat, but too much heat can melt or degrade the rubber.
- Check Periodically: Remove the O-ring every 30-60 seconds to check its size. This method is highly sensitive, and over-shrinking or damaging the O-ring is a risk.
- Cool Down: Once the ideal size is achieved, remove the O-ring and allow it to cool completely before use.
Note: This method is generally not recommended for casual users due to the risk of damaging the O-ring or even causing a fire if not monitored carefully. Stick to boiling or hot air for most common scenarios.
Tips for Optimal Results and Longevity
- Uniform Heat Application: Regardless of the method, always try to spread the heat around evenly so that it can fully penetrate the rubber and shrink it equally all around. Uneven heating can lead to distortion.
- Don't Over-Shrink: It's easier to shrink an O-ring a little more than to try and expand it again. Go slowly and check the fit frequently.
- Rinse and Air Dry: After heat treatment, rinsing with cold water and allowing the O-ring to air dry helps "set" the new, smaller size and ensures it's ready for optimal performance.
- Understand Your Rubber Type: While these methods work for most common rubber O-rings, specialized synthetic rubbers might react differently.
- Precision is Key: Shrinking rubber is a task that requires precision. The degree of shrinkage depends on the specific material and its intended application.
- Restore Functionality: The goal isn't just to make the O-ring smaller, but to restore its functionality and ensure optimal performance and longevity in your projects. Discover effective methods on how to shrink swollen O-rings and restore their functionality.
In conclusion, rubber O-rings are vital components in countless applications, but they can become loose or swollen over time, compromising their sealing ability. Fortunately, instead of replacing the entire O-ring, which can be costly and time-consuming, you can explore natural and effective methods to shrink them. By understanding the properties of rubber and applying controlled heat through techniques like boiling water or using a hair dryer, you can restore your O-rings to a perfect fit. Remember to prioritize safety, apply heat uniformly, and allow the O-ring to cool properly. Mastering these techniques will help you achieve optimal performance and longevity for your O-rings, ensuring a perfect seal and saving you time and money.
How to Clean a Black Porcelain Sink: 4 Options for You - Home Arise

3 Ways to Shrink Rings - wikiHow

3 Ways to Shrink Rings - wikiHow
